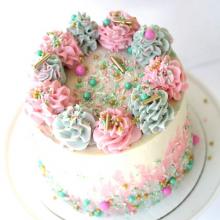
Link to the exact size topper (and flowers) Shawna used in this project it HERE.
When you want to change the size of the inspiration photo on one of my shared documents
OR when an inspiration photo has to be printed larger than an 8.5x11, it gets a little tricky when doing it from your home computer, so follow these directions:
- First, click on the Google Doc link that I've provided. (Or insert your own photo into a new Google document). You'll need to have a google account to complete the next steps, so if you want to print from these google docs I add, it's a good idea to setup a google account.
- Ok, after you click on the link and the photo has opened in the document, click "file" in the upper left hand corner.
- A menu drops down... then click on "make a copy". A box pops up where you can give the file a name and designate which folder in your google drive you'd like to save it to. It should then automatically open up that copied document for you.
- You should be able to edit that document, changing its size and such (you can only view the original that I posted.) To print out a very large photo, on that new document you'll have print it out in sections and then move the photo around (without changing it's size) and print out remaining sections. For example, in the eagle cake tutorial, I would print out the wing section you see first, and then start moving it to get to the other areas. In order to move it, you first need to click on the picture. A blue box should appear around it.
- Then, click the "crop image" icon up in the tool bar. It will show you the full picture, and you can then drag it to a new section to print out.
- Once you've dragged the photo and decided the next section to print, click the "crop image" icon again
- and then you can click on the printer icon in the tool bar to print out that section.
You should be able to continue to hit the crop button and move the picture around to each new section to print out until you've printed the entire photo...and then piece it together and attach with tape!
Isomalt Crystals Cooking Instructions:
- It's best to cook 3 pounds of isomalt crystals at a time (to help insure they don't discolor)
- Put the crystal into a pot on the stove and add just enough DISTILLED water to create a wet-sand look
- Turn on burner to med-high heat
- Either cover pot or have a small bowl of distilled water and a silicone pastry brush ready to wipe down sides of pot if needed
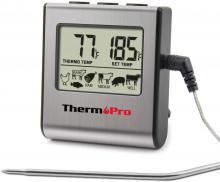
- Set digital thermometer to 330 degrees F
- Prepare a cold water bath in either a larger pot that the isomalt pot can rest in or in a sink
- When the isomalt reaches 330 degrees, take the pot and place it in the cold water bath just long enough for the hissing of the pot to stop (@10-20 seconds)
- Your isomalt can be used right away for pouring applications (good idea to let it sit for just a bit until some of the air bubbles are gone) or you can put it into the oven at 275 degrees in a pyrex measuring cup to keep it warm and at a pourable temperature if you're not ready to use right away
- Pour left over isomalt into silicone ice cube/other trays to make small blocks of isomalt to store and use later
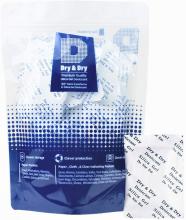
- Put isomalt blocks you are storing into a small ziplock bag and then a larger ziplock bag with a food safe silica pouch for storage
Isomalt tips:
- You can use add airbrush colors to color your melted isomalt to color it
- Use a fan to cool your isomalt when you want it to dry/set quickly
- Use a chef's torch to help rid surface of airbubbles and bring back glossiness
- Use an edible spray shellac (PME and Chef Rubber have good ones) on all surfaces of the finished isomalt creation to keep it from getting cloudy, before handling too much
- Do not put isomalt creations in the fridge (or risk cloudiness)
Check out this video tutorial on how to make modeling chocolate or this live session recording that is all about modeling chocolate and making a rose, too.
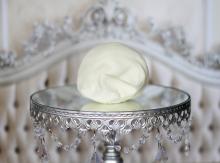
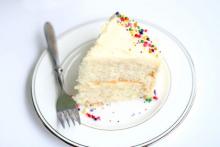
The only white (vanilla) cake recipe I’ll use, now, as it’s moist, dense, carves well, and is RIDICULOUSLY delicious! (Works great for cupcakes, too!) Just leave out the almond extract and substitute it for more vanilla if you want this to be a delicious vanilla cake!
The only chocolate cake recipe I’ll use, now, as it’s moist, dense, carves well, and is RIDICULOUSLY delicious!
This is an adaptation of Lauren Kitchen's Easy Buttercream recipe. It's a little bit sweeter than her original recipe (but definitely not too sweet!) and works well for piping flowers and buttercream designs, as a buttercream underneath fondant (as it hardens in the fridge nicely to get those sharp edges on your fondant) or just left as a buttercream finish on your cake. It's my new favorite!
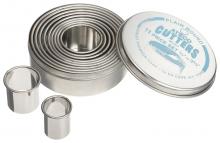
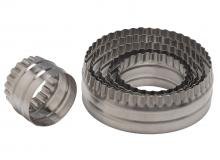
Each cutter has a fluted side and a plain side
Cutters range in diameter from 2 inch - 4.5 inch
Constructed of quality, long lasting stainless steel
By Ateco – professional quality and quality design
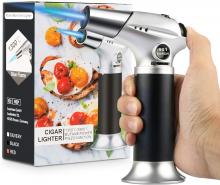
✔ Our refillable butane kitchen torch comes equipped with a safety lock and a flame adjuster, allowing for optimal precision and control. And for added safety and reassurance, our torches always ship without gas!

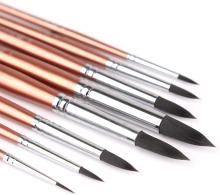
Professional round brushes - Made from GOAT HAIRS and HIGH-GRADE IMPORTED NYLON. NATURAL GOAT HAIRS have great liquid holding ability, SOFT and SMOOTH blending with high-grade nylon gives you perfect sable-like spring back and be able to hold its shape, more AFFORDABLE than genuine kolinsky and sable hair. These brushes do not compromise their quality.
Sturdy and Durable - Nickel plated copper ferrules, more DURABLE and double-crimped to the handle, NO WOBBLING.
Ergonomic - Well balanced wooden handle finished with champagne-colored metallic finish. Smooth touch, comfy control, it brings you great joy while painting.
Brushes come in 8 popular sizes:#0,#1,#2,#3,#4,#5,#6,#7, equivalent to common round size #1, #4, #5, #8, #9, #10, #12, #15 . Meet all your basic needs for round brushes.
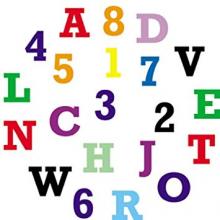

Explore this amazing silicone tool that cuts and molds perfect letters every time making what was once a hassle into a fun and easy project.



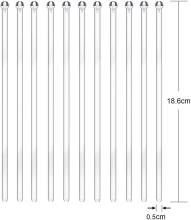
Size: each plastic stick is about 18.1 cm/ 7 inch in length, great size fits most small coffee cups and disposable lid, which ideal for stirring your favorite cocktails and mixed drinks
Stir hot and cold drinks: plastic sticks in simple, popular and contemporary design has a knob at one end to keep fruit and vegetable garnishes in place, great for mixing drinks such as coffee, tea, mixed drinks, cocktails, hot chocolate, etc.


