Creating a Gorgeous, Sparkly, Glitter Cake Tier!
Angie is having a baby.
Angie is one of those ridiculously gorgeous Latina women who look sickeningly beautiful even when they first lift their heads off o’ their pillows in the morning.
You know… the type that make you look at yourself in the mirror a few minutes longer than normal while your brain starts wondering if you should try a different make-up look or hairstyle… or SOMETHING. And then, the next time you see said horrifyingly perfect woman, you realize she barely even has any make-up ON. Barf.
Yeah, that type.
Angie also happens to be my friend. And if I didn’t love her like I do, I might have a much harder time keeping myself from strangling her for looking so STINKING gorgeous every second of the day. But Angie also has this crazy smile that somehow hits you right in the heart and suddenly wipes out all thoughts of taking her out at the knees. It just makes you happy and so very glad to see her. Every time.
SO annoying, ya know?
Anyway, like I said, Angie is having a baby. Her FIRST baby. And it’s a baby girl. (Imagine how gorgeous THIS little bundle is gonna be.) And I eagerly volunteered to make the cake for her baby shower.
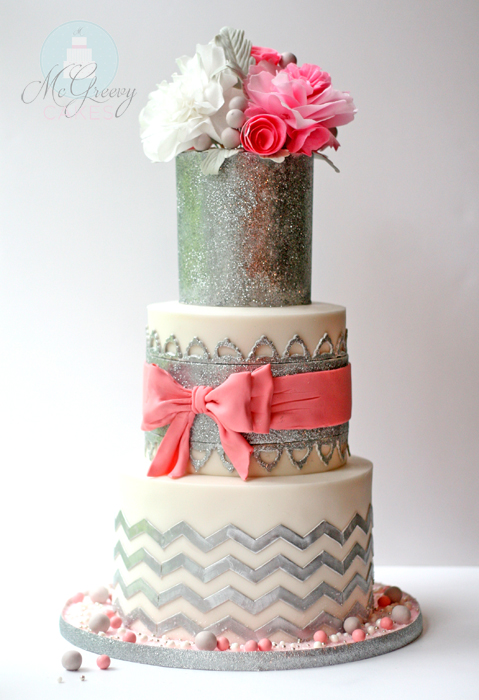
So when it came to the design… knowing that Angie likes pink and silver and “elegant”, my first thought was “sparkle”. This cake needs lots and lots of SPARKLE.
‘Cause Angie sparkles. EVEN when she doesn’t mean to. And since I happen to be a HUGE fan of all things sparkly, it wasn’t very hard to convince my brain to order up that extra jar of disco dust on Amazon, and get down ta BIZness.
So that’s what I did. And this is what I created. And when Angie looked my way at the party and flashed that SERIOUSLY unfair smile of hers at me, I knew I got it right. And THEN, when she walked over and gave me a big bear hug, I didn’t even want to shove her (only slightly roughly) into a dark closet any more. I was just glad to see her again.
Even if I COULD relate to Cinderella’s stepsisters for teensiest, weensiest little second.
Some details of the making of this cake…
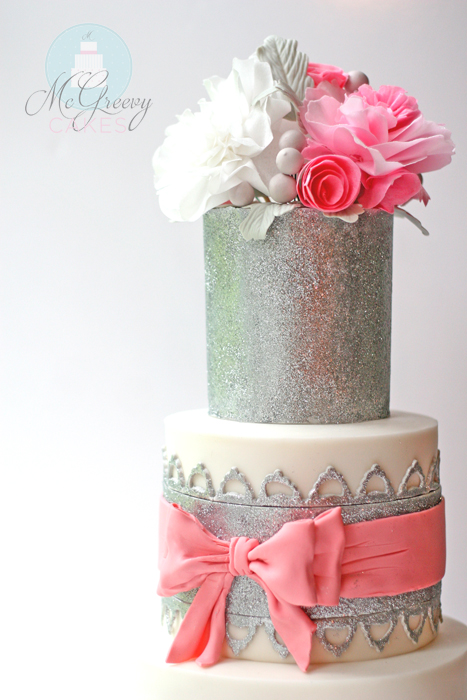
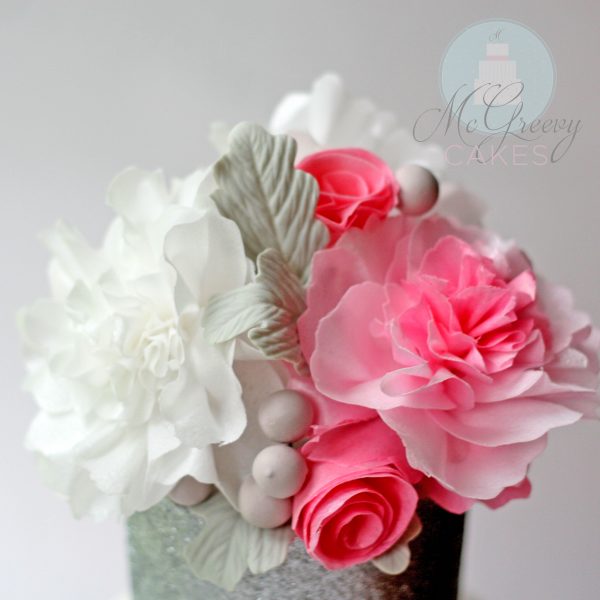
I decided to try my hand at some wafer paper peonies. I wanted “quick & easy”, and with wafer there’s no drying time. So I got out my travel steamer and some pink airbrushed wafer paper I had left over from another project and started fiddling around. These were my end result.
HERE’S the wafer paper I use.
(The tutorial showing how I make these wafer paper peonies is available with a Cakeheads membership!)
To make the top tier, I made some gray modeling chocolate. (See my mod choc recipe and video instructions, HERE.)
I measured the height and circumference of my tier and rolled out my mod choc accordingly.
I used my quilting ruler (which I can’t live without, and you can find HERE) to measure and cut the right size piece to wrap around my cake.
The reason I chose to wrap modeling chocolate around the tier rather than just cover it in fondant is because it’s much easier to remove this way. I’ll be using disco dust to cover the entire tier, and disco dust, while non-toxic and made for cake decorating, is not technically edible. So when the cake is being served, you can easily remove the outer mod choc layer with the disco dust on it, or you can just inform the guests to peel off and avoid the outer layer.
Next, I dusted the mod choc wrap with some powdered sugar to avoid stickage, and gently rolled it up upon itself.
Then, I placed it alongside the tier and gently unwrapped and smoothed it against the cake.
I didn’t need a full three tier cake, but I wanted the look of a three tier, so I made the top tier a (styrofoam) dummy tier. But you can obviously do this exact same technique with real cake.
When I got to the back, to get a nice clean cut I wrapped the end over the beginning and used my exacto knife to cut a straight line through BOTH at the same time.
That way, after I removed the excess, I’d have a perfectly matched seam.
For this next step, if you’re using real cake you’re going to want to put it in the freezer for a good half hour or so first.
Ok, when it’s out of the freezer (only if it’s real cake) gently rub the mod choc with water. Not a lot, just enough to get it sticky, but make sure you get every last square inch of it or you’ll see patches without glitter in the end. (Depending upon your humidity levels, it may already be tacky and you won’t need more water.)
Then lay it on its side on a piece of wax paper or a baking sheet and shake the disco dust onto it, turning it as you go until the entire surface is covered. This top, 4″ round tier used one small jar of disco dust. (I used American Silver disco dust, which you can find, HERE.)
You can use a soft brush to gently go over the glitter to remove any excess, and you can use a small brush and a little water to patch up any glitterless spots.
Voila! You have severe bling!!
If you’re not covering the top with decorations, make sure that after you the wrap the cake with mod choc, you…
then roll out another piece of mod choc onto wax paper.
Flip the wax paper with the mod choc on it onto the top of the cake.
Place a flat board on top of the wax paper.
and then flip the entire thing back over so that the cake is upside down upon the mod choc.
Use an exacto kinfe and carefully cut around the top edge of the cake so that when you flip it all back over, the top of the cake is then covered with a perfectly fit mod choc disc, as well.
To wrap the sparkly part of my bow around the middle tier, I used this nifty little measuring tool from Wilton to score a line into the fondant (I honestly can’t remember what this thing is even called! So sorry about that!), to use as a guide when unwrapping the mod choc. (I used the same technique as I did on the first tier but just added the sparkle on before I attached it to the cake.)
I then rubbed above the line with a bit of shortening, and unwrapped the glittery mod chocolate onto the cake.
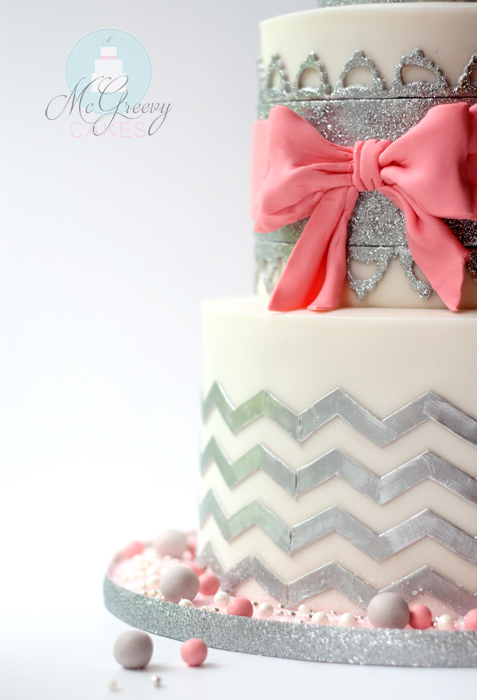
After that, I added a pink bow and a sparkly decorative border to the top of the glittery mod choc wrap. (Of which I somehow forgot to check and completely missed the fact that the front, top section of it was misshapen… which could have easily been fixed had I been PAYING ATTENTION. *sigh*)
The bow was also made of mod choc, and I attached it to the silver glitter wrap with a little bit of water. I wasn’t sure how well it would stay, but to my pleasant surprise, the thing wouldn’t budge!
I used my FABULOUS chevron onlay by Marvelous Molds (I know it’s slightly expensive but it is worth EVERY penny, I tell you) to easily and quickly get chevrons onto the bottom tier.
And then I painted them with a silver highlighter & lemon extract mix.
Instead of covering the cake board with fondant, I shook on some white (clear) sanding sugar you can find, HERE. (You can just use regular granulated sugar, instead, to get a similar look if you don’t have any sanding sugar on hand.)
And I rolled some gray “berries” from the left over gray mod choc and added a few to the top bouquet, and a few to the cake board, on top of the sugar, along with some white sugar pearls, pink chocolate candies (sixlets), and silver dragees to finish the look.


