Making Tufted Cake, Mini ruffles, and Creating/Painting Custom Images
I’m sitting out on my screened in (cause I’d rather not go out on an eaten-to-death-by-mosquito note, if you’re hearin’ me) porch as I write this. The sun has just gone all the way down, the childrenssss are snug in bed, Thomas had an appointment to keep… and it’s just me and the lightening bugs, right now.
Wull, and you. But you’re not really here… so that doesn’t exactly count.
Have you ever experienced lightening bugs?
I never had until I moved out here… out into the “sticks”, a bit… our house set back in the woods well off the street… a street with ZERO street lamps, that is.
I’ll never forget the first year we were here, in the summer, standing outside in the pitch dark on a warm June night, watching (for my very first time) those crazy little bugs make the whole place sparkle. I honestly felt a little giddy.
I mean, the books, the stories… they were REALLY real. There REALLY are these amazing little bugs who fly around on warm summer nights with their bums glowing, on and off, trying to attract each other… so that they can make MORE little amazing bugs with glowing butts.
And when they all get their glow on at the same time, in the pitch dark of the night… it is TRULY a sight to see. It is, quite simply, beautiful. THE NIGHT ACTUALLY SPARKLES. I wouldn’t have really believed it if I wasn’t seeing it, as we speak, with my very own eyes.
I always imagine God smiling down on us when I’m watching these little bugs. Like He knew it’d make us all stare in awe.
Wull, while we humans don’t have such, erm…. illumintation on our (back) sides, we still know how to attract each other. And let it be said that we, too, know how to make more little humans just as effectively.
AND… much to my great joy, many people like to eat cake while celebrating the making of said little humans, and their imminent arrival into our lives… our hearts… and our backyards, to be added to the ranks of those of us who stare in awe at the bugs who make the night glitter.
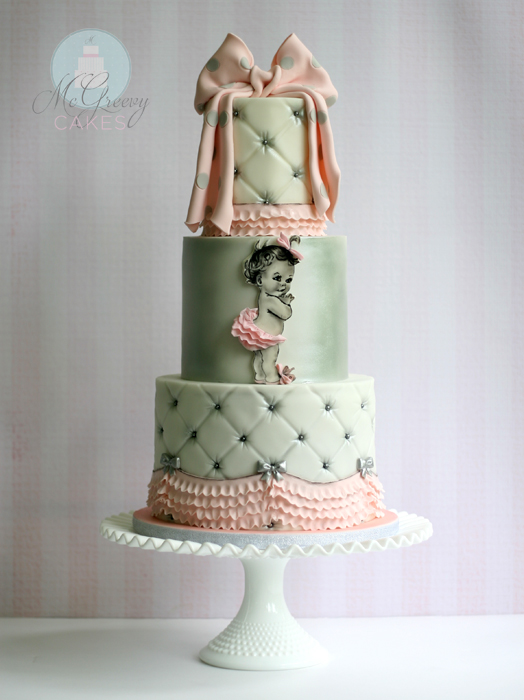
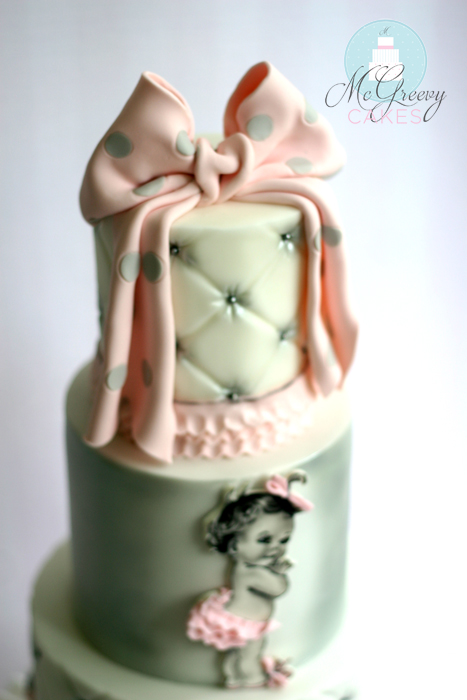
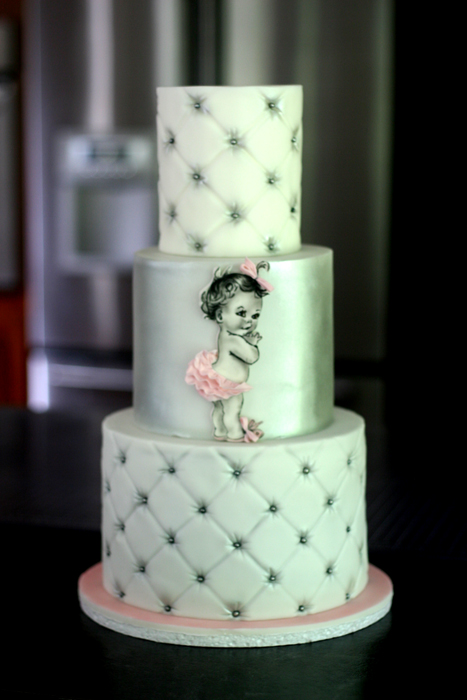
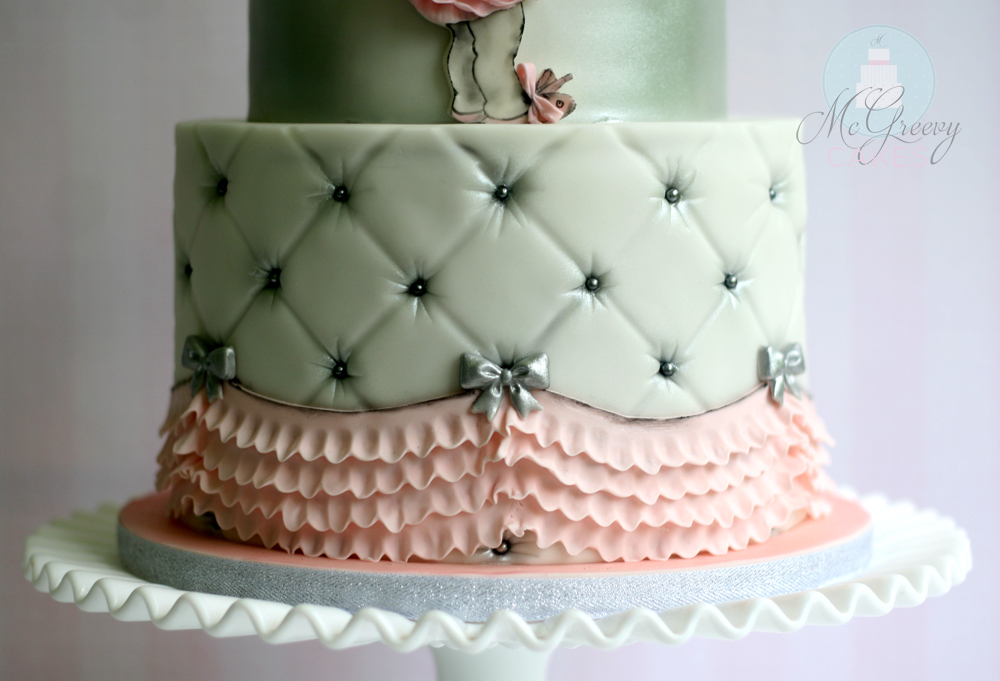
So it was with a happy heart that I designed this vintage style, tufted, ruffled, baby girl shower cake for my big brother’s fiance… my soon to be new sister-in-law… as the ladies of the families showered her with gifts, delicious food, and of course, bouts of raucous laughter (’cause my mom and her friends don’t know it any other way), all because she’s about to bring the newest (and quite possibly, final) sweet pea, baby girl into our lives.
In short, arriving soon is my 8th niece on my side (though my 10th niece, in total)… one of 11 girl cousins (’cause I pushed out three of my own) with two more boy cousins to be added to the GRAND total of 13 cousins who will all run around together some day, chasing those mind boggling little bugs, hoping to catch them in a mason jar for just a few minutes… so that they can marvel up close at those beautiful, majestic butts.
And I just can’t wait for her to get here.
(And somehow I know that, now, lightening bugs will always remind me of her. Xx )
Notes on how I made the edible baby plaque, polka dot bow, the ruffles, and the tufted finish…
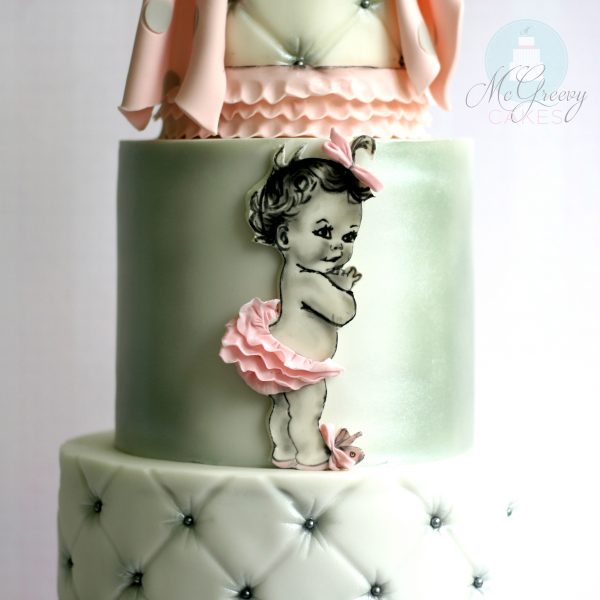
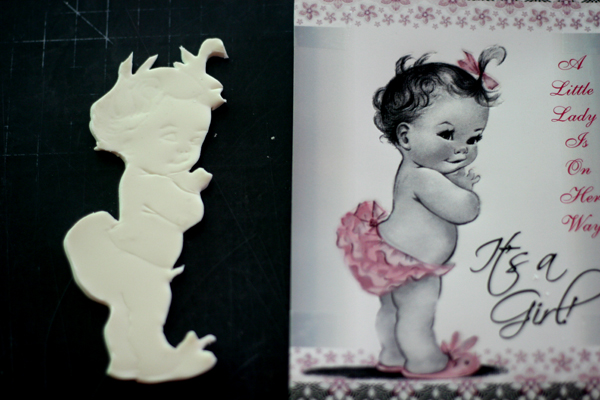
I used the shower invitation image and placed it over some rolled out gumpaste.
I traced over the outline and features with a pointed tool which then left the impressions in the gumpaste, underneath.
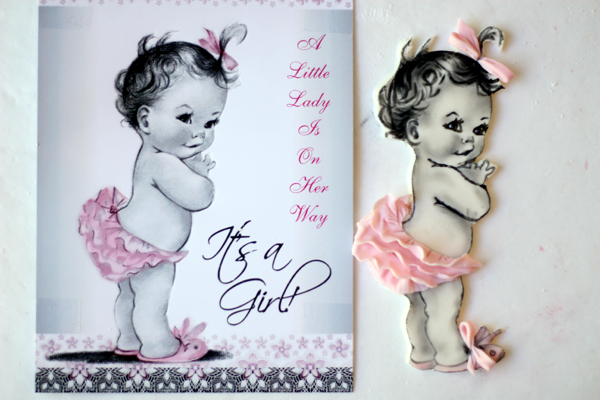
Then, I used edible markers, and petal dusts to “paint” the picture while using the image as my reference.
See my painting video tutorials, here, to see how this was done.
I then set it aside to let it stiffen a bit.
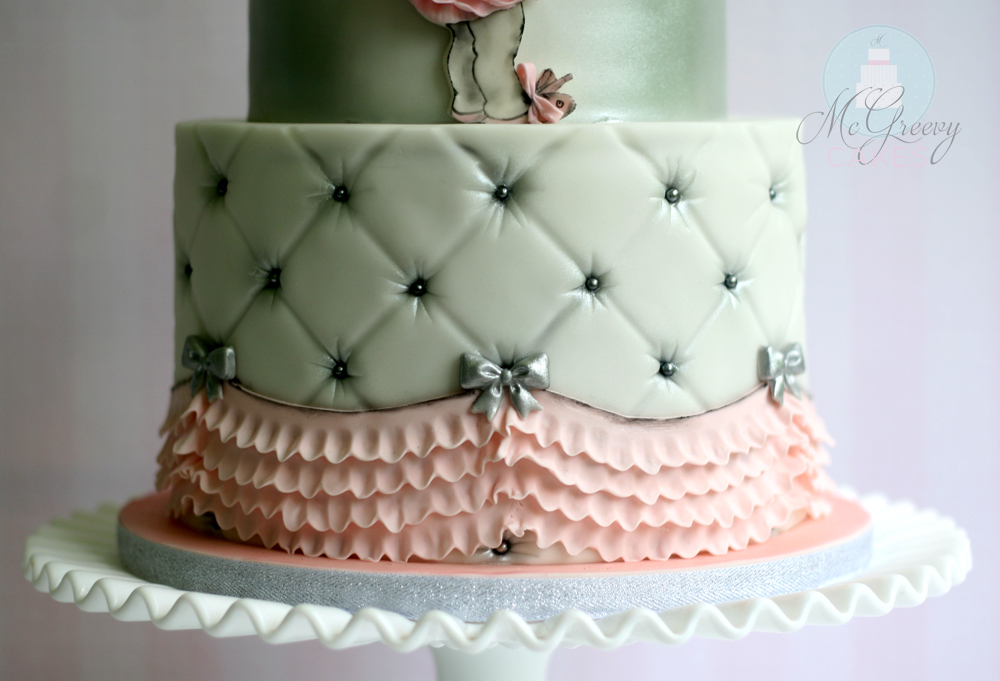
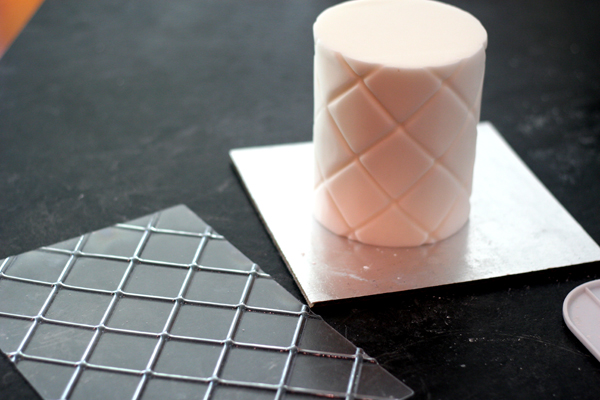
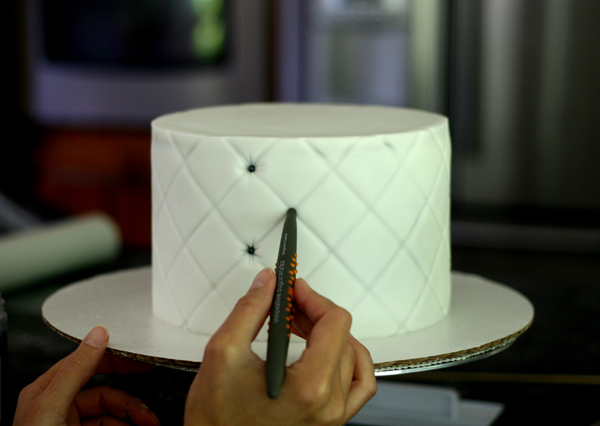
To easily make the patterned lines, I used a “waffle cone” impression mat I had in my tool closet.
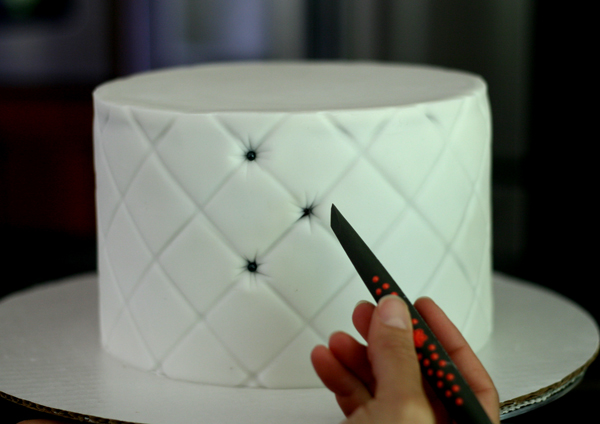
Then, I used my round tipped sugar shaper (get a discount on a set of these AWESOME tools, here) to make indentations where the lines intersect, so I could easily add sugar pearls when I was ready to.
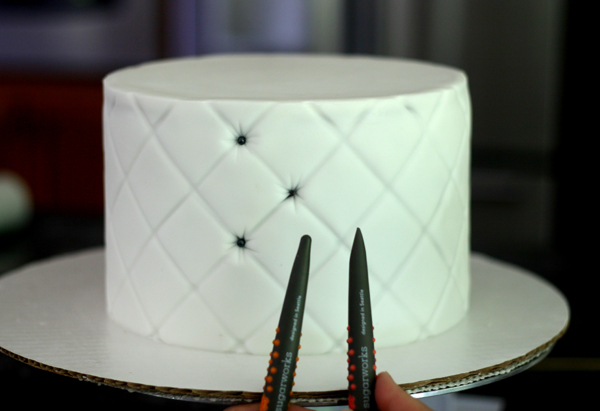
Before I added the sugar pearls, though, I used my angle chisel tip sugar shaper to make little lines around the indentations, to make them look “pulled” a bit.
Here are the two shapers I used for that project.
Then I used some shortening to help the pearls stick and added them into the indentations.
I airbrushed some silver over the pearls and “pulled” marks to add some depth, and I also airbrushed the middle tier, leaving some white in the center where I then attached the baby girl plaque using some shortening.
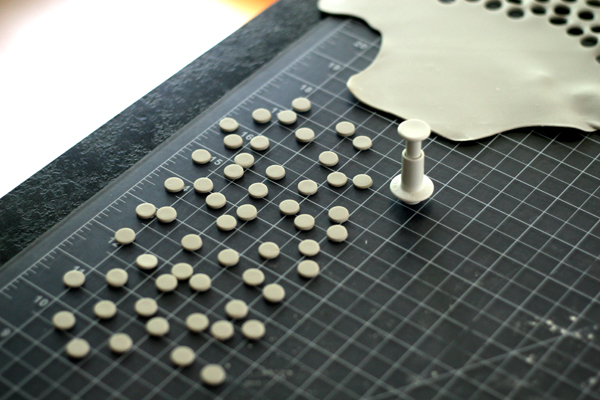
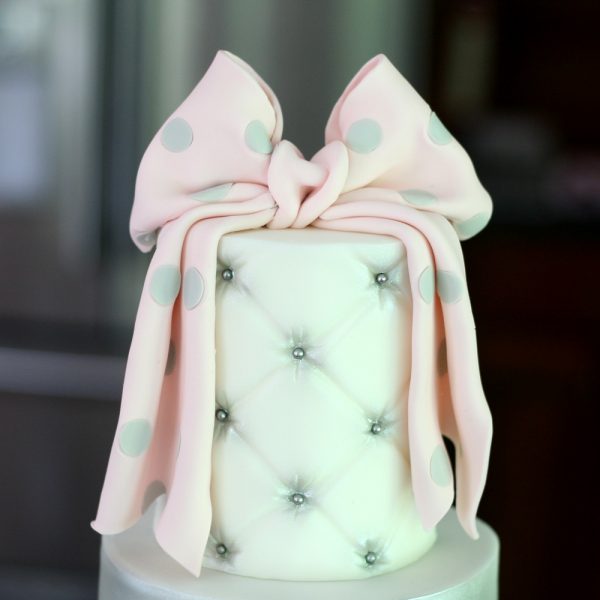
To make the polka dot bow, I cut out some small circles using my circle plunger cutter set.
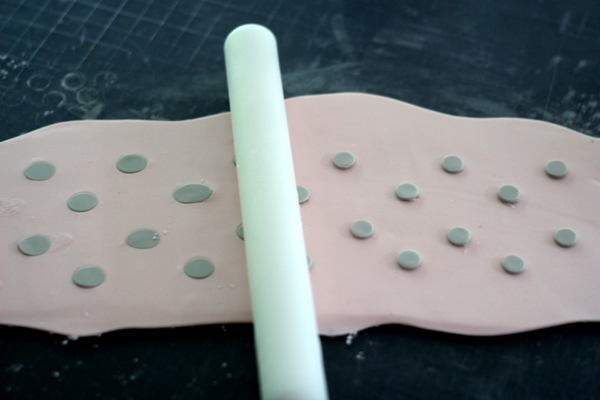
I rolled out a long, wide strip of pink modeling chocolate (you can use a 50/50 modeling chocolate/fondant mix, as well) and placed the circles, evenly spaced, on top.
I used some shortening to try to help them stick, but I think next time I’ll skip that step as I’m not sure it was needed.
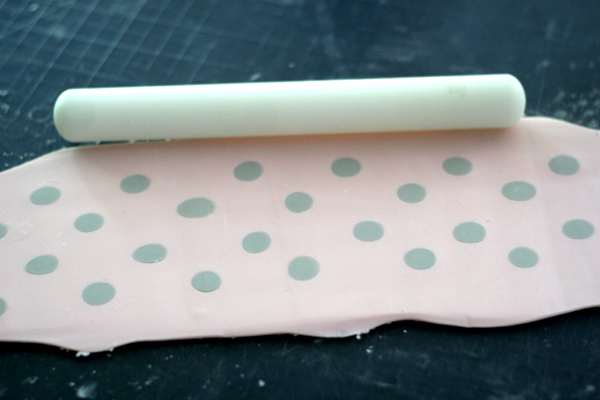
I then rolled over the circles, gently, lengthwise, in one direction, and then shifted my rolling pin and rolled “up” widthwise, as well (or perpendicular to the direction I rolled, first).
The trick is to roll one full length in the same direction, with the same amount of pressure the entire way, before you switch directions, to try to keep them uniform.
And then you can just make your bow as you normally would!
Check out my free video on how to make a bow in the project center, HERE.
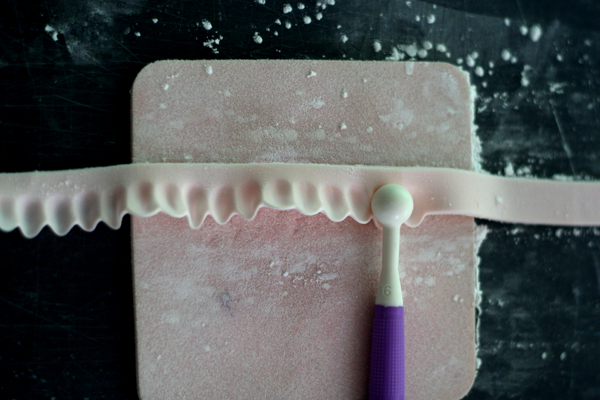
To make the ruffles, I cut thin strips of the pink modeling chocolate/fondant mix, and used my ball tool on one edge, basically pushing in and pulling down gently, over and over again along the length of the strip.
I attached one row of ruffles at the bottom first using some shortening, and then added three more rows above.
I used my favorite Martha Stewart bow mold to make the tiny bows, and then dusted some black on the edge of the top row of ruffles to add to the vintage look.
And that was that!
Now bring on mah baby NIECE!

